San Francisco is famous for its micro-climates. It could be warm & sunny in Potrero Hill, while Presidio Heights is shrouded in thick fog. In order to provide hyper-local weather information such as these, Weather Underground crowdsources data from individuals with automated personal weather stations (PWS’s).
The Netatmo Weather Station is the one of the cheapest available PWS’s to set up. The modules look more fashionable and discreet than conventional PWS’s, which have that distinct look of scientific instruments. This week, we’re tearing one down to show you how it works!

Alison Thurber from Mindtribe is joining me on this teardown to provide some much-needed electronics insight. It’s dangerous to go alone—take an electrical engineer!
Outdoor Module
Netatmo advertises that the modules have “one-piece aluminum body”…that’s only partly true. What I’d call the “body” has both cnc machining aluminum and plastic components. A ten-degree twist separates the inner sensor module from the aluminum tubular housing and upper plastic cap. The upper plastic cap pops out, too.
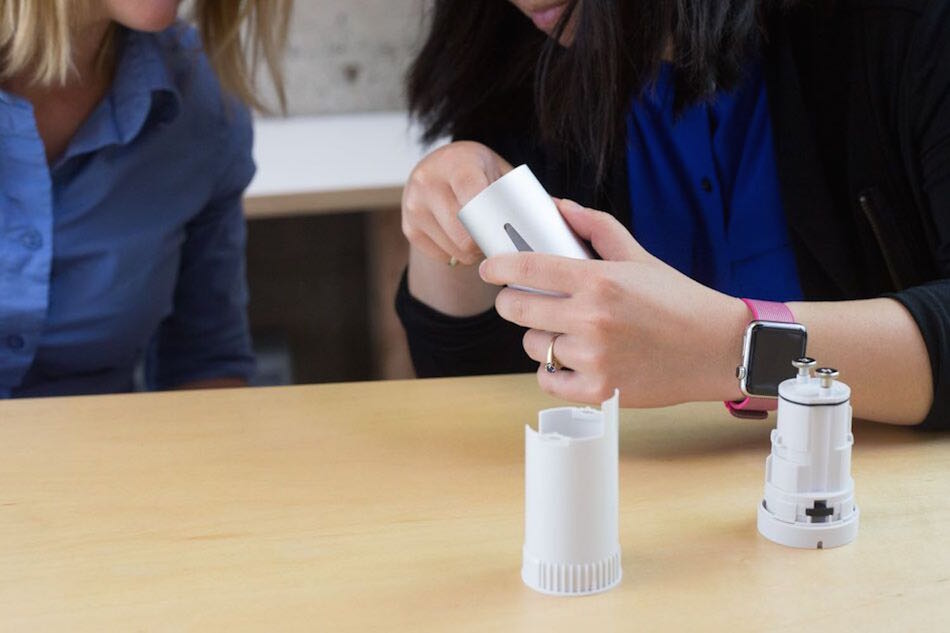
The upper cap and sensor module do all the hard work work of keeping this thing together. The aluminum housing is simply encapsulated between these plastic pieces. The twist & lock mechanism has great tactile feedback when it clicks into place. You can see the plastic “leaf spring” on the upper cap deflect as you rotate it.

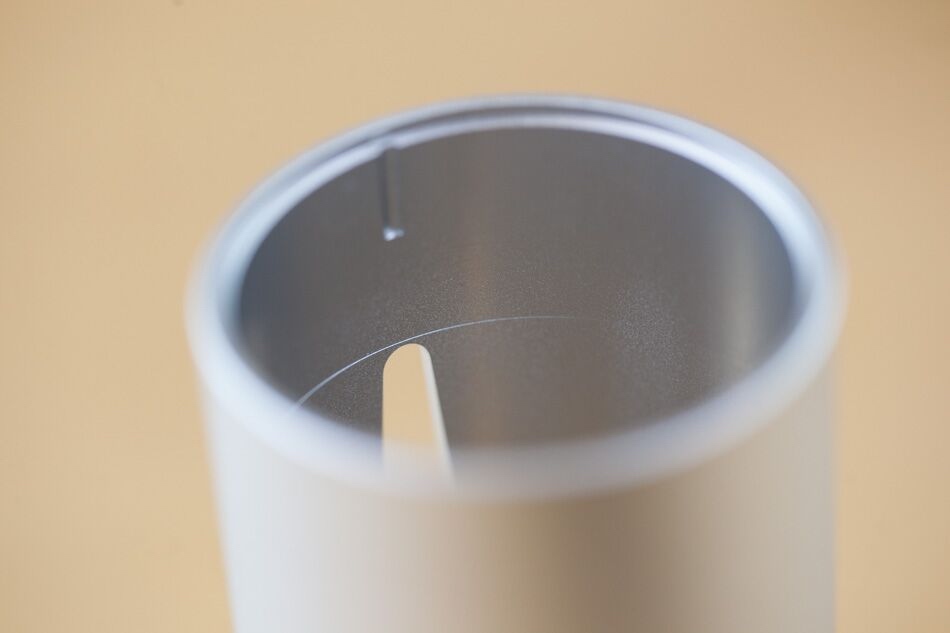
The tubular aluminum shell is made by extrusion, then post-machined and bead-blasted for a matte appearance. It’s likely also clear anodized to protect it from corrosion—especially important for the outdoor unit. The vertical groove on the inner surface is a design for assembly feature to help align the upper cap. You can also see a slight machining defect in the photo.
Does this aluminum + white plastic look remind you of an Apple product? It’s not a coincidence!
The sensor module has its own lid that’s held on by screws. At first we were puzzled: Why use Phillips head thumb screws to secure the lid? It seems a bit excessive.

Turns out, this lid keeps 2 AAA batteries in place to power the sensors. The screws, combined with an elastomer gasket between the lid and the rest of the sensor module, ensure the unit is waterproof. The Outdoor Module is supposed to last two years once you put in new batteries, so the opening/closing mechanism of the lid can afford to be a little bit time-consuming.

Now, we just have this thing left. The brains of the module must be inside. There are two torx security screws holding this thing together; they are super recessed and hard to access.
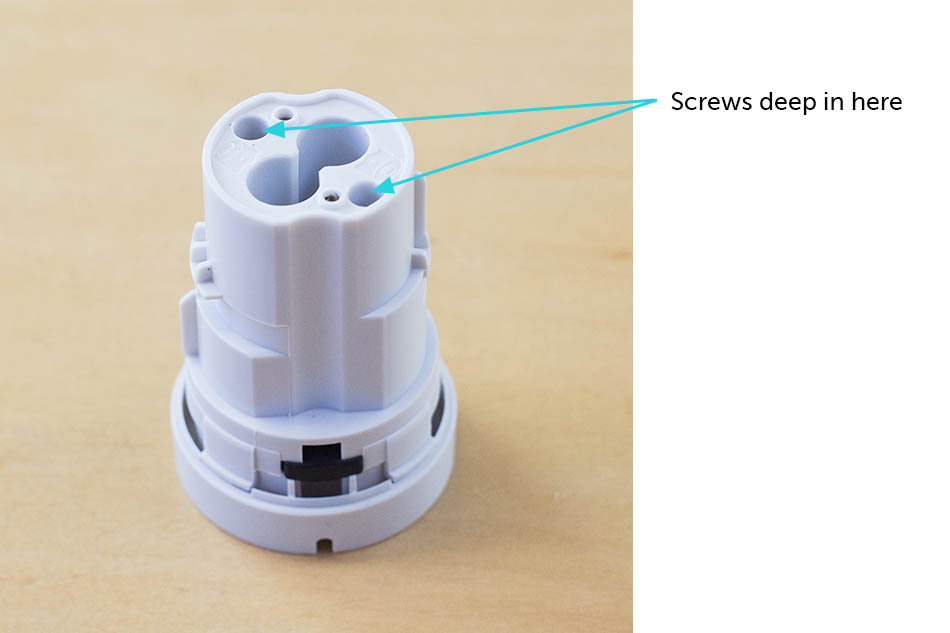
After a few minutes of cursing, we finally cracked the module open.
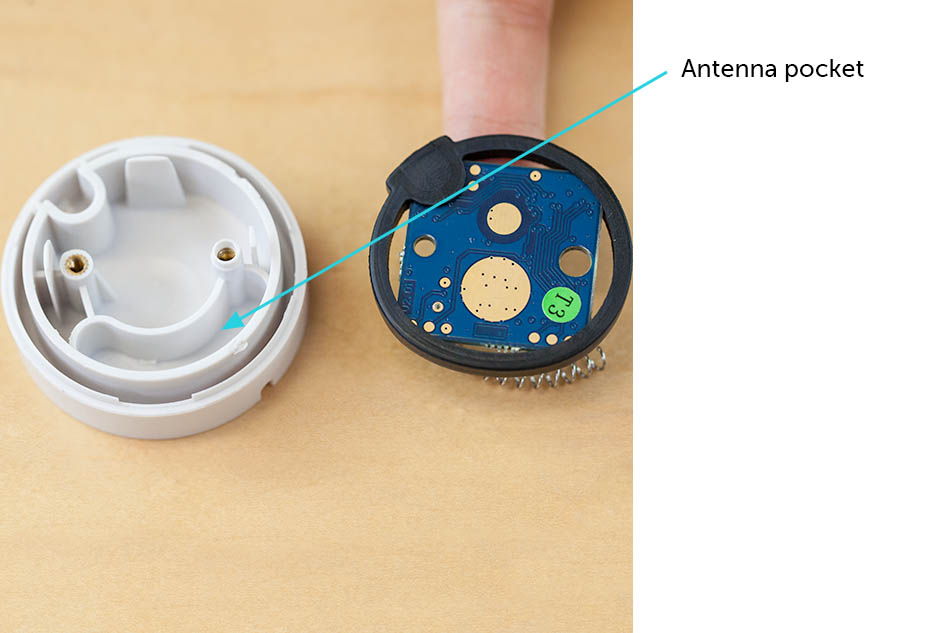
We see a familiar elastomer gasket for waterproofing. The ring gasket has inner grooves that hold the square PCBA in place.
The base has threaded inserts. I’m actually surprised that it’s not just self-threading screws going straight into plastic bosses, because the screws are intentionally inaccessible, and the product is not meant to be taken apart by the user.
Note now the two screw holes are different sizes to force assembly orientation, matched with the two slightly different screw bosses.
Let’s take a look at the PCBA. There are two large exposed pads on the bottom side for battery terminals. On the top side, a big radio antenna sticks out of the board.
When assembled, the antenna sits entirely in the plastic base which is RF transparent. The antenna would not work if it were shielded by the aluminum shell, which like all metals, attenuates the signal and acts as a Faraday cage.
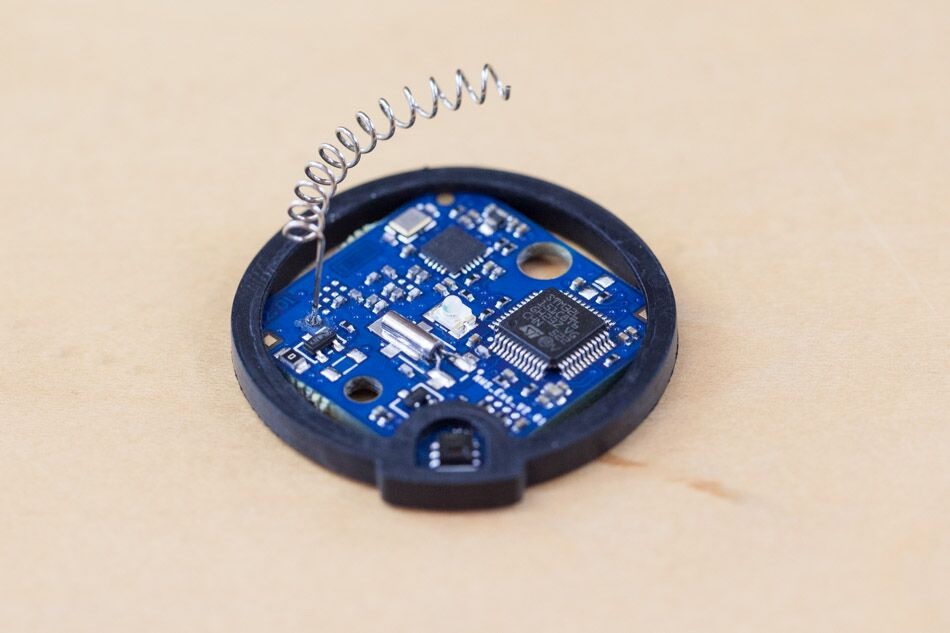
The top side of the PCBA is considerably busier.
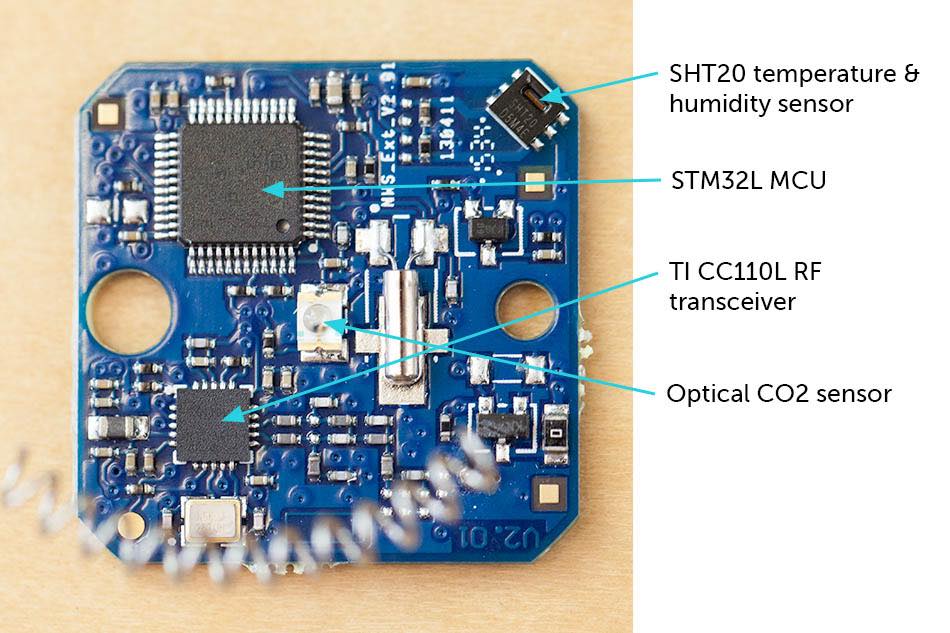
The “brain” of the Outdoor Module is a STM32L low power MCU. There is also a CC110L RF transceiver chip made by Texas Instruments; that’s how the Outdoor Module sends collected data to the Indoor Module.
All of the environmental sensors are SMT components soldered onto the board. There is a temperature and humidity sensor (Sensirion SHT20) and a CO2 sensor. The temperature and humidity sensor is exposed to the ambient atmosphere through a “window” in the gasket.
The CO2 sensor is optical: it’s an infrared red LED and receiver pair. Emitted IR light is partially absorbed by CO2 in the ambient air. If the air has a higher CO2 level (measured in ppm), the more the light is absorbed. The IR receiver then measures the remaining light and calculates CO2 level.
Here’s Alison doing detective work on the board. It feels like having a lab partner. Teamwork makes the dream work!

Check out our teardown of the Indoor Module next!


