Time to read: 7 min

I’ve had the good fortune in my career to take studio arts classes, and was surprised to also find it gave me clarity in how I think about the broader product development process. Even though I enrolled in those classes with the intent of expanding my design sensibilities with better studio skills, I ended up gaining a more effective understanding of how prototypes serve the product design process.
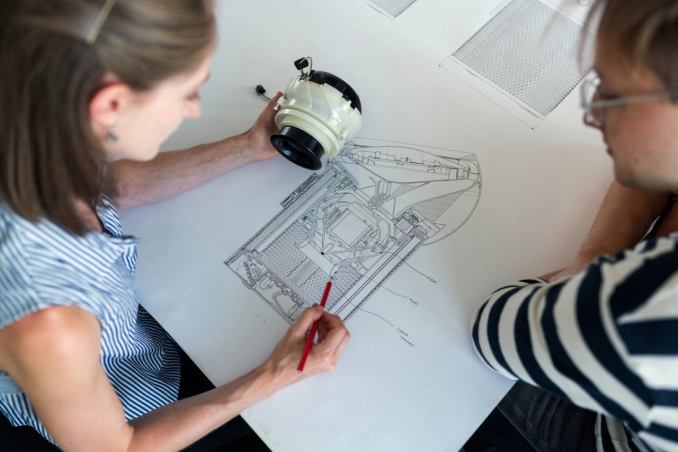
Every Design Starts with a Picture
In classic studio marker rendering, the first element to go down on paper is not a marker. Instead, you apply colored chalk dust with cotton gauze to create a general sense of volume, so something like a shaded blue egg shape for what eventually becomes a car. Then, successive layers of marker detail add more definition to the form — first with sweeping lines, and finishing with smaller features like wheels, door handles, and rear view mirrors.
Similarly with figure drawing, the first strokes of charcoal on the page are intended to capture the essential gesture and mood of the model’s pose with an economy of essential organic curves, to form the underlay of the developing work.
In both cases, the key to capturing one’s intent in the finished piece is getting those initial volumes and gestures right. All the detail added as the work evolves can never “fix” a flawed foundation. The same can be said of building a house, writing software, and of course, product design.
CAD Isn’t a Replacement for Prototyping
While prototypes can be appropriate and informative at any time in the development journey, the ‘detail design’ phase is most often characterized by heaps of prototypes lying about the model shop. It comes after completing a rigorous and strategic ‘feasibility & architecture’ phase, and creating a robust Product Requirements Document (PRD).
As sensible as that may sound, I’m surprised by how often the ‘detail design’ phase is minimized, discounted or overlooked altogether. In my career, I’ve had at least one prospective client go so far as to ask whether, for budgetary reasons, we could skip prototyping outright. After all, the design and modeling software will tell us if anything is wrong with the final design, right? I call this point of view the “CAD It Up!” mentality — as in, “all we need to do is CAD it up and we’re done!” Nevermind that no successful product has ever come about skipping such a critical step.
Artifact is ultimately the prime expression of any design solution, and needs to be given material embodiment as early and as often as possible. That much is non-negotiable.
Of course, a lot of great design work was accomplished prior to the ascent of CAD in the 1980’s. My dad, for example, an engineering executive for a commercial equipment company, never had any technology on his desk beyond a telephone and a calculator.
His mode of design consisted mostly of conversations and sketching with the highly skilled machinists in the shop. Once armed with an understanding of the intent of the part in question, they would go make it and share their assessments with my dad, iterating on the design until all were satisfied. Only then did they enlist the drafter to create a set of production drawings. This direct, proto-centered approach is still a powerful strategy that uses CAD to capture and refine the design in parallel.
The Purpose of Prototyping
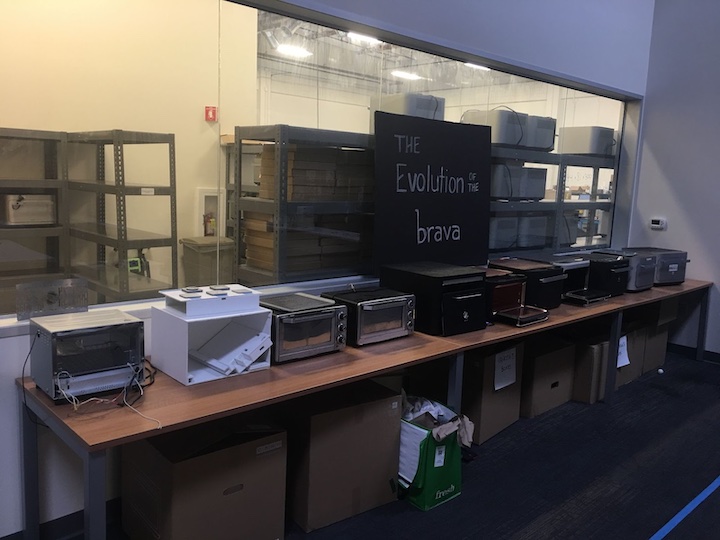
Whether it’s the evolution of the Wright Flyer over the course of years as Orville and Wilbur returned to Kitty Hawk every summer with their newest iteration, or Thomas Edison’s 10,000 light bulb prototypes, or James Dyson’s famous “5,127 prototypes”, our culture values rigor from designers and engineers bringing us new technological innovations. At the same time, the development of prototypes as a practice is not a commonly understood methodology or broadly shared discourse.
First, let’s be clear on one fundamental axiom: everything is a prototype. What differentiates prototype from product in designing for manufacture is that the production design is simply the iteration which meets the requirements spelled out in the PRD.
While a well-articulated PRD helps single out the final prototype, other important factors also drive efficacy and efficiency in prototyping — like money. Any cogent business plan for a new product establishes budgetary limits on product development costs, so you need an efficient and effective development and prototyping process. As designers and engineers, we must ensure a new product evolves in a financially responsible way, while getting the most learning and value out of each prototype iteration.
Frameworks for Effective Prototyping
Frameworks for prototyping vary, but there are common ways like Proof-of-Concept/Alpha/Beta, and Looks-Like/Works-Like/Looks-Like-and-Works-Like. In my work, we proceed through major milestones in the ‘detail design’ phase with simple labels – P0, P1, P2, etc. – to avoid confusion.
The P# milestones reflect significant prototype builds of increasing integration and resolution, each with its own nested threads of supporting prototypes converging on the major P# build. Those nested threads comprise independent, singular resolutions of the subcomponents in the larger P# assembly or system.
Each domain – like electrical, mechanical and industrial design – is responsible for contributing validated solutions to the integrated whole for each major build. And those domains perform their own series of rapid prototypes, so there are iterations inside iterations. The key for every domain is to advance through rapid iterations using materials and fabrication techniques in line with the level of resolution appropriate for the objective of that particular prototype.
For example, a first order prototype is fast, gestural, and only one step removed from sketches on a whiteboard. Such prototypes are crafted from materials like foam-core, popsicle sticks, hot-melt glue, Lego®, and modeling clay, and are essentially 3D sketches for ideation, used to help visualize a concept quickly enough to keep up with a train of thought.
Second order prototypes are used to refine, test and validate specific features of a product, and so require more intent and design effort. They’re typically used for buttons, latches, snaps and other simple mechanisms on the mechanical side, or an assemblage of dev kits and off-the-shelf components on the electrical side. For industrial designers, these prototypes are volume studies and interaction mock-ups. The point of a second order prototype is to independently validate each element before introducing them to one another.
Third order prototypes bring together multiple elements from different disciplines that have been refined to a high degree of resolution. Each of the P# milestone prototype builds, including the “final” prototype prior to production, is a third order variety. P0 validates that solid foundation built in the initial drawing, with subsequent P# builds adding increasing levels of integration and resolution.
This process of methodically increasing levels of complexity and integration is simply a way to control variables in a quest for efficiency. And my approach was informed by an engineering professor of mine, a veteran of aerospace engineering in the ‘60s. He said “you don’t put a prototype engine on a prototype airframe, ‘cause when you walk up to that smoking hole in the ground you won’t know what broke first.”
It means that the complexity of any system we intend to study (in our case, a prototype, of course) does not grow linearly with the number of elements in that system. Rather, with each element n added to the system, there are up to n-1 new relationships between elements to deal with.
For example, a prototype with four interdependent parts has six part-to-part relationships (3+2+1). When we add a fifth part, that jumps to 10 (4+3+2+1) relationships to monitor when testing the prototype, and so on. Early prototypes focus on single features, functions and characteristics so we can pay attention to the emerging relationships between these elements with subsequently more integrated prototypes.
So, my designer and engineer friends, I recommend you take a novice studio class where things are fundamentally about making stuff with your hands. Whether figure drawing, welding or pottery, they’ll serve as a visceral reminder that there are no shortcuts to a satisfying outcome, with prototypes or otherwise. And remember, a beginner’s mindset is a key skill in design, because it keeps you curious and open to new possibilities. Then approach each iteration in your prototyping process with that frame of mind to ensure you’re building a solid foundation for an amazing product.
Fictiv Addendum
Our friends at Spanner have configured their shop spaces to facilitate frictionless access to making first order prototypes, so the flow of ideas isn’t interrupted by logistics. Beyond that, they rely on industry partners to get quality parts fabricated quickly — Fictiv’s powerful platform works seamlessly with their design process to provide the right parts in the right materials, quickly and reliably, with access to experienced advisors to help fill in the blanks. This allows Spanner to focus on the design process, undistracted by maintaining and operating their own equipment or searching for vendors.
For all your prototyping needs, Fictiv has you covered. Fictiv has extensive industry expertise in producing custom parts, in a variety of materials using 3D printing, CNC machining and urethane casting — and when your prototype is ready for volume production, Fictiv offers injection molding too.
Fictiv simplifies custom part sourcing with intelligent, streamlined, automated workflows. Fictiv is your operating system for custom manufacturing that makes part procurement faster, easier, and more efficient. Create an account and upload your part to see what the Fictiv instant quote process, design for manufacturability feedback, and intelligent platform can do for you!


